
As a luxury sports car owner, you likely take exceptional care of your C4 Corvette and treat it as a work of art. That being said, the 1980’s and 1990’s technology of the C4 is nowhere near the capabilities of today, making modern convenience upgrades a popular choice. Older cars tend to have more problems as time goes on, particularly if you still get a lot of use out of your vehicle — your radio is no exception.
If your stereo is acting up, it’s probably a good time to modify your sound system. Maybe you lost a cassette or CD to it or the buttons don’t work like they used to. Even if your radio is working fine, you might just want some modern upgrades to play music from your phone or just change your C4’s interior style. In this post, we’ll show you the best aftermarket parts and accessories for your C4 audio modifications and walk you through a step-by-step guide for radio control unit removal and installation.
Best Aftermarket Radio for C4 Corvettes
A new radio is one of the many ways you can make your Corvette experience even better. If you’re looking to make a C4 Corvette stereo upgrade, there are plenty of aftermarket parts and audio systems that can meet your needs.
Whether you need front speakers with or without Bose, a new antenna, a volume knob or a radio and conversion kit, you can find everything you need for your C4 Corvette aftermarket radio install. For quality aftermarket radio kits, check out brands like Kenwood and Custom Autosound Mfg Inc.
You’ll find Kenwood options for different C4 Corvette years, and these kits come with intuitive button and volume knob placements so you can more safely adjust your music as you drive. Or, get Custom Autosound Mfg Inc. options that enable Bluetooth connectivity, giving your Corvette modern functionality all wrapped in a classic package. For a complete overhaul of your Corvette’s sound system, you can also get a C4 Corvette speaker upgrade with new options.
There are many options for radio upgrades thanks to modern technology. Though Chevrolet manufactured a more conventional design, it paved the way for hundreds of radio upgrade possibilities for anyone, from audiophiles to more casual music enjoyers.
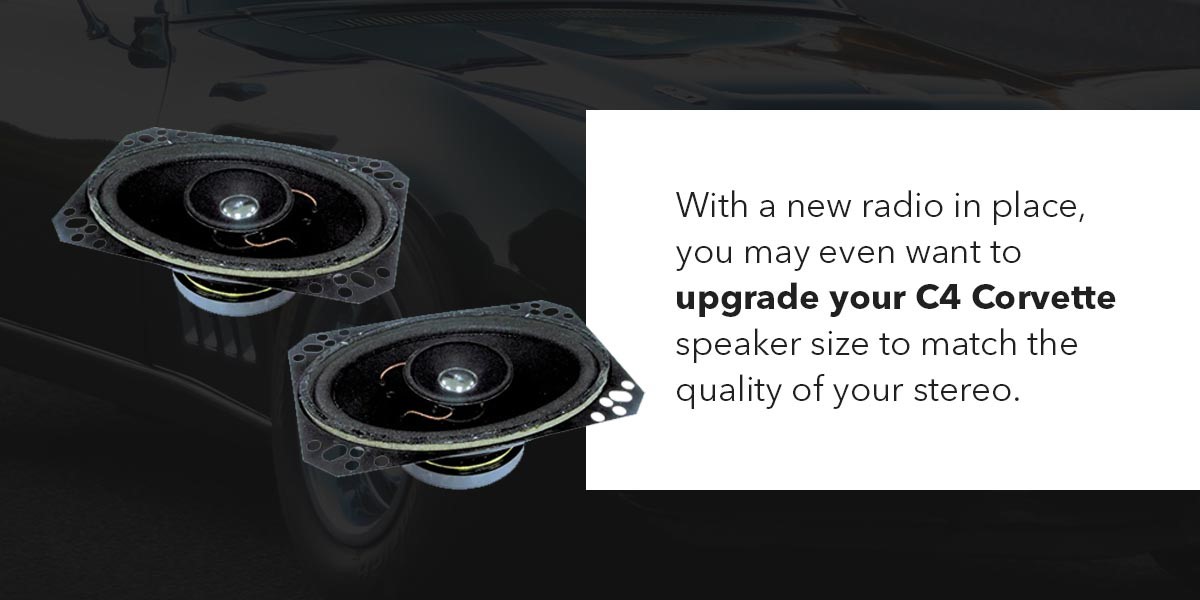
Whether you’re upgrading your stereo because you’re a music enthusiast or simply because you’re experiencing issues with sound or button function, you can choose from many floating-face radios that will allow you to enable Bluetooth connections. With a new radio in place, you may even want to upgrade your C4 Corvette speaker size to match the quality of your stereo. The result makes your C4 even more enjoyable for joyrides or everyday driving.
Please note that when replacing the Delco-Bose stereo system, both the radio and speakers will need to be replaced as these specific Bose speakers only work with this radio.
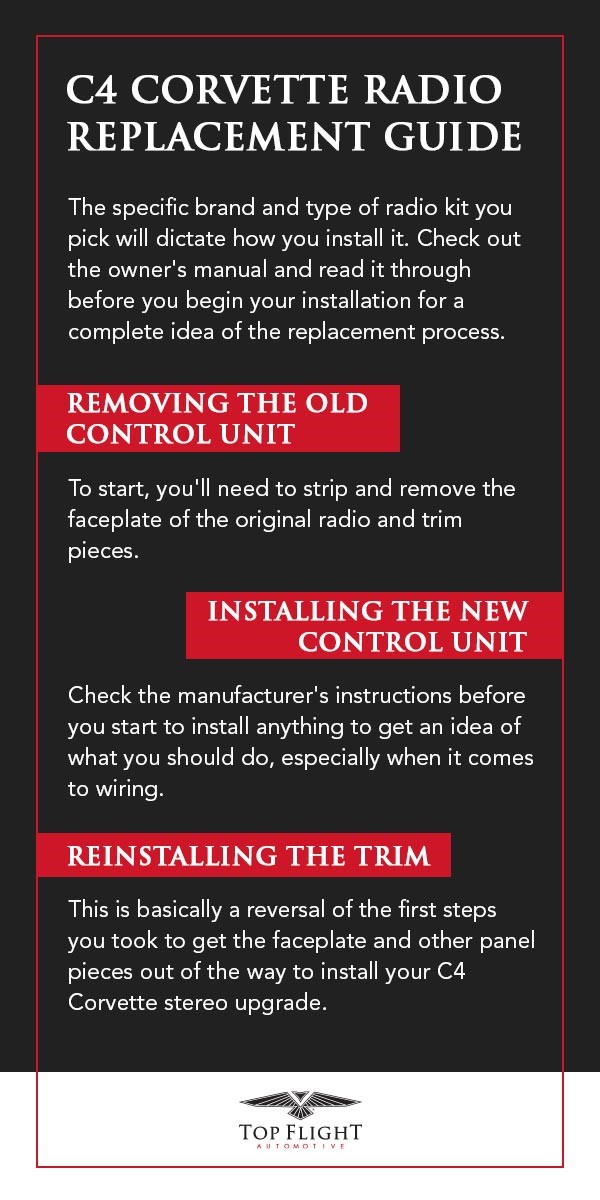
C4 Corvette Radio Replacement Guide
The specific brand and type of radio kit you pick will dictate how you install it. Check out the owner’s manual and read it through before you begin your installation for a complete idea of the replacement process. With that in mind, here’s a general step-by-step run-through on how to remove and replace the radio in your C4 Corvette to guide your upgrade. We’ll be focusing on the control unit specifically.
Removing the Old Control Unit
A new control unit can make a world of difference in how your C4 Corvette functions and looks, whether you pick an option with a sleek screen or one with intuitive button controls. But this upgrade involves a bit more than just pulling the old radio out and popping a new one in.
To start, you’ll need to strip and remove the faceplate of the original radio and trim pieces. This gives you better access to the existing radio so you can take it out and install your C4 Corvette head unit upgrade. To get the trim out of the way and remove your current radio control unit, follow these steps:
- Start by disconnecting the negative battery terminal — some wires stay live even if your Corvette isn’t running, and you don’t want to risk shorting anything.
- Your radio removal actually starts by the gear shifter. Take out the screw in the cup holder of the center console — it should be in the one in front, closest to the dash. You may have to remove a cup holder mat first to access the screw.
- Open the center console and remove the two screws toward the front. There should be one to the left and one to the right.
- Set the parking brake and move the gear shifter back to give the trim plate clearance to move.
- Pull the lower trim plate you unscrewed back away from the front dash.
- Remove the two screws on the front dash panel that you exposed by moving the trim back — there’s one screw on the left and one on the right.
- Pull the steering column down to access the AC vent.
- Take out the screws in the AC vent, with one on the left and one on the right.
- Pop the AC panel out of the dash.
- Take out the one screw on the top right you exposed by pulling the AC panel out so you can access the control unit.
- Pull the control unit faceplate off of the dash. You might need to push a little on the raised edges of the dash for clearance to get the faceplate out.
- Move down to the radio head unit, which has screws on the left and right sides. On the left, gently pull the dash panel to the side to access the top and bottom screws and remove them. This is usually a tight spot, so moving the dash trim out of the way can help reach the screws.
- Remove the middle screw on the right so you can carefully push the right side dash panel out of your way a bit.
- Unscrew the top and bottom screws on the right side.
- Take out the radio head unit. You might need to work the unit back and forth a bit. The wiring can get caught up on components behind the unit, so you may have to reach back behind the radio to loosen the wires.
- Disconnect the two wire connectors and fully remove the old head unit.
Don’t be surprised if there are some screws missing throughout this process — a previous owner could’ve made some changes and neglected to put screws back in. Get replacements if you need to, and keep your screws in zip-top baggies or labeled magnetic trays to keep track of everything.
Taking pictures as you go can help, too, so you can retrace your steps when it’s time to put everything back. Other than that, the AC panel and faceplate you’re removing look different enough — no need to worry about mixing up those pieces later on.
Installing the New Control Unit
With the old unit out, it’s time to put your new one in. Again, installation will vary depending on the kit you got. Check the manufacturer’s instructions before you start to install anything to get an idea of what you should do, especially when it comes to wiring. With all that in mind, here are general steps for installing your new radio control unit:
- If required with the unit you have, attach the mounting brackets.
- Test fit the faceplate over the radio. Ideally, you won’t have to make any cuts or modifications to the faceplate, which lets you easily swap out the radio in the future or put the original control unit back in.
- Test fit the radio in your Corvette where the old radio was. Place the faceplate back on but don’t screw anything back in. You’re just trying to see that everything will fit flush into place once you actually install it.
- Make sure any screw holes in the new kit line up with your Corvette’s existing panels and parts.
- With the fit checked, take the radio out of your Corvette to finalize the wiring.
- Ideally, your radio kit will have a C4-specific wiring harness, which acts as an adapter between your Corvette and your new control head. Attach the loose wire ends of the harness to the corresponding wires in your radio if necessary — there should be specific instructions in your manual, and the wires should be color-coded. You can twist, solder and wrap these wires or join them using solderless connectors.
- Connect the wiring to the Corvette’s connectors.
- At this point, you should test the radio before installing it. Reengage the battery, turn the ignition to accessory and try it out. If the radio is working, you can move on. If not, double-check your instructions and wiring connections.
- With the radio wired in correctly, slide it into place, carefully lining it up so the mounting brackets align with the existing screw holes.
- Test the radio again to make sure sliding it into place didn’t disconnect any wiring.
Reinstalling the Trim
If your radio is working how you want, it’s time to piece your Corvette’s interior back together. This is basically a reversal of the first steps you took to get the faceplate and other panel pieces out of the way to install your C4 Corvette stereo upgrade. Double-check that your parking brake is still engaged because you’ll be moving the gear shifter back during this process. Here’s how to put everything back where it belongs:
- Put the faceplate back into place, ensuring the openings line up with your new radio and don’t create any gaps.
- Screw the top and bottom fasteners back on the right side before pulling the dash edge trim back into place and screwing the middle screw in.
- Put the screws on the left side of the faceplate back in.
- Screw the fastener at the top of the faceplate by the AC vent back in.
- Double-check that there aren’t any gaps between the faceplate and the radio unit now that everything is screwed in place.
- Replace the AC vent and the two screws keeping it in place, then move your steering column back into place.
- Put the two lower screws back into the front dash panel to secure that piece.
- Once the upper faceplate is back in place and secure, place the lower center console trim back. You should see a fork under the gear shift indicator. Make sure this is lined up with the shifter pin before moving the console panel back into place. That assembly adjusts your gear shift display when you change gears, so you’ll want to make sure these pieces are connected.
- Screw the two fasteners inside the console back in and close the console door.
- Put the cup holder screw back in and add your cupholder mat back in if there was one.
Check that any dash or console display lights are still working to make sure you didn’t disconnect any wiring by mistake, and your Corvette radio install is complete.

Upgrade Your C4 Corvette Stereo With Top Flight Automotive
If your current radio system in your C4 Corvette is damaged or simply doesn’t work like it used to, you can find the parts you need for an upgrade at Top Flight Automotive. With decades of experience and a team of knowledgeable reps that can help you throughout your build process, we carry everything you need to keep your classic Corvette running like it’s supposed to — or even better.
At Top Flight Automotive, we offer fast shipping to make it easier to get the Corvette parts and accessories into your hands for your next project. Shop online to view our C4 Corvette audio parts today.
Sources:
- https://www.topflightautomotive.com/products/chevy/corvette/c4/parts/car-audio/speaker/
- https://www.topflightautomotive.com/blog/top-c4-corvette-mods/
- https://www.topflightautomotive.com/products/chevy/corvette/c4/accessories/car-audio/


January 31st, 2024 at 9:29 pm (#)
I have a 1987 Corvette, looking to upgrade my system. My vette is red.
February 5th, 2024 at 8:18 am (#)
Leon, We’d love to help with that!
February 14th, 2024 at 8:46 am (#)
I have a 96 C4 and would like to upgrade as well. CD player with Bluetooth would be nice.
February 14th, 2024 at 8:51 am (#)
There’s nothing like a good sound system to make your drive even more fun!
February 14th, 2024 at 2:18 pm (#)
Removed entire Bose system in my 87 convertible to include the rear antenna. Installed a Bose cd am/fm stereo from a 1980 Tahoe. Replaced all speakers and relocated the rear speakers from laying flat to facing forward in each rear corner. The stereo took some cutting of the holding area and added brackets, however, the stock faceplate fit nicely. Modified a rear bracket and storage buckets from 87 fastback and fit in the old back speaker location.